Follow along as we answer all your questions related to editing images in WordPress. We’ll show you how to crop a WordPress image, as well as scale, rotate, flip, restore, delete and replace one. You’ll also learn how to edit the thumbnail only, or edit the main image and leave the thumbnail untouched.
And finally, we’ll cover common reasons why the WordPress edit image feature might not be working—and of course, show you how to fix them. Use the table of contents below to jump directly to that section. Or just skip to our video playlist.
- Why edit images in WordPress?
- How to access the WordPress image editor
- Image editor toolbar/buttons
- Scale an image
- Crop an image
- Rotate an image
- Flip an image
- Restore the original image (revert all edits)
- Replace an image (keep the same file name)
- Delete an image
- Edit image thumbnails
- Image editing not working?
01Why Edit Images in WordPress?
Let’s be honest. If you’re a graphic designer, professional photographer or even just an avid Photoshop user, you probably won’t spend much time editing images in WordPress. Using professional image editing software has a lot more benefits.
However, a majority of WordPress users don’t have access to any special software, and just need to make a few minor adjustments to their images. The WordPress image editor is great because:
- it’s free
- it’s easy to use
- it doesn’t require any additional software
- it saves a copy of the original image
- you don’t have to re-upload your image after making changes
02How to Access the WordPress Image Editor
The WordPress image editor is found in your WordPress admin area.
- Login to your site
- Navigate to Media > Library
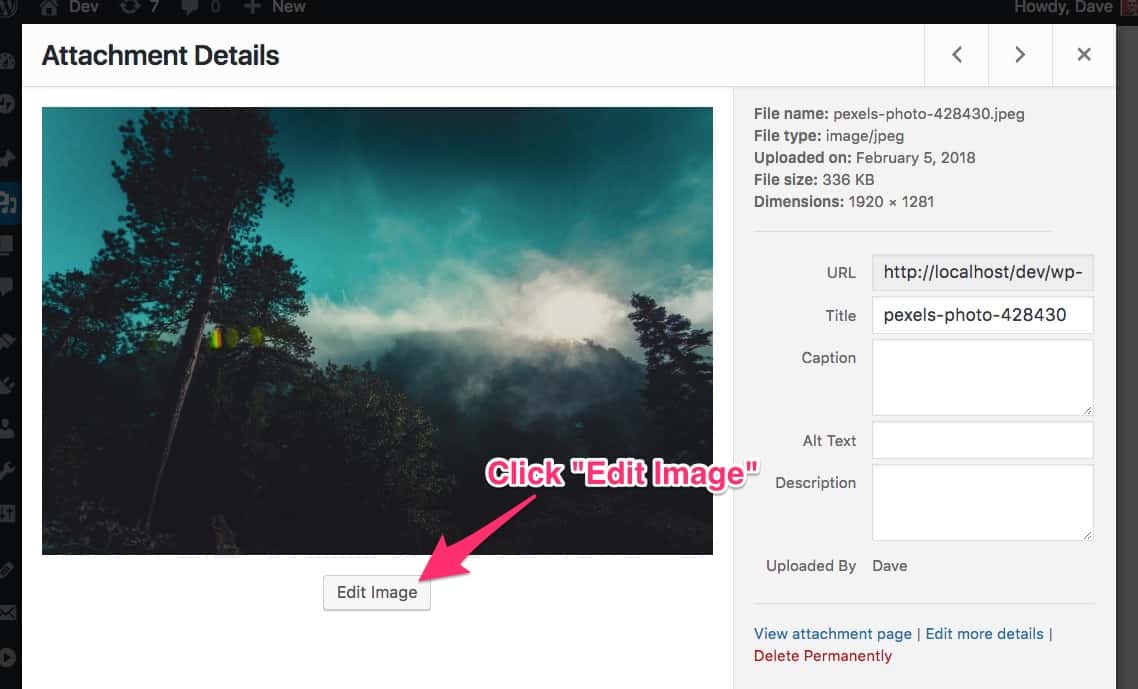
- Click on the image you’d like to edit
- Click the button underneath the image that says Edit Image

03WordPress Image Editor Toolbar/Buttons
Before we talk about how to use each image editing function, I want to briefly explain what each button does.
| Button | Action | Description |
|---|---|---|
| Crop | Remove parts of the image from the top, right, bottom or left sides. | |
| Rotate Counter-clockwise | Rotate the image 90° counter-clockwise (to the left) | |
| Rotate Clockwise | Rotate the image 90° clockwise (to the right) | |
| Flip Vertically | Flip the image vertically (top becomes the bottom, bottom becomes the top) | |
| Flip Horizontally | Flip the image horizontally (left side becomes the right, right side becomes the left) | |
| Undo | Undo your previous image change | |
| Redo | Redo your last image change |
Now that you understand what each button does, let’s talk about how to use each one to achieve your desired effect.
04How to Scale a WordPress Image
What does it mean to “scale” an image?
To scale an image is to reduce it’s overall size (in pixels), while retaining it’s aspect ratio. No parts of the image are removed; you are simply making the entire image smaller in size.
When scaling an image, you choose to reduce either the width or the height. WordPress will automatically calculate the other value.
For example, if your image is 2000px x 1000px, and you scale the width to 1000px, the height will automatically adjust to 500px.
In WordPress, you should always scale an image before editing it in any other way.
Follow these steps to scale an image in WordPress:
- In your Media Library, click on the image you’d like to scale
- Click the Edit Image button located below the image
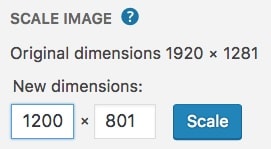
- In the top-right corner, under “New Dimensions,” enter a new value for either the width or the height
- Click the Scale button
The image is automatically resized to your new dimensions.
05How to Crop a WordPress Image
Follow these steps to crop an image:
- In your Media Library, click on the image you’d like to crop
- Click the Edit Image button
- Click, hold & drag your cursor to select the area of the image you’d like to keep
- Click the
 button
 - Click the Save button
06How to Rotate a WordPress Image
To rotate an image in WordPress:
- Select the image you’d like to rotate
- Click the Edit Image button
- Click one of the rotate buttons to rotate your image clockwise or counter-clockwise
- Click the Save button

07How to Flip a WordPress Image
To flip an image in WordPress:
- Select the image you’d like to flip
- Click the Edit Image button
- Click one of the flip buttons to flip your image horizontally or vertically
- Click the Save button
08Restore a WordPress Image to its Original Size
After you make changes to your image in WordPress, you have the option to revert back to the original image. This will discard all edits you’ve made to your image, however, it will not delete the edited images from your server.
To restore a WordPress image:
- Click on the image you need to restore
- Click the Edit Image button
- Click the Restore Image button in the right panel
This button will only appear if you’ve previously edited your image.
09How to Replace a WordPress Image & Retain the File Name
By default, WordPress does not allow you to replace an image and keep the same file name. If an image with that file name already exists, it will append a -1 to the file name.
However, you can use a plugin to replace a WordPress image and keep the file name. This will completely override the previous WordPress image with the same file name.

To replace an image & keep the file name:
- Install & activate the Enable Media Replace plugin
- Navigate to your Media Library
- Click on the image you’d like to replace
- In the right panel, under “Replace Media,” click on the Upload a new file button
- Then click the Choose File button, and select your replacement image
- Make sure “Just replace the file” is selected
- Click the Upload button
Congrats! You have successfully replaced your image, kept the same file name, and do not have to worry about updating any references to the image.
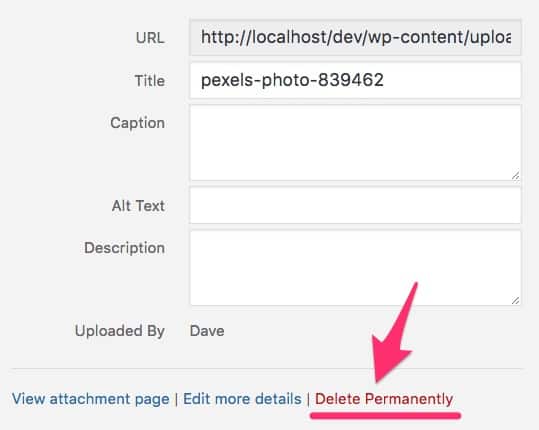
10How to Delete a WordPress Image
To delete an image from your WordPress Media Library:
- Click on the image you’d like to delete
- In the right panel, click on Delete Permanently
- You’ll see a confirmation message that says, “You are about to permanently delete this item from your site. This action cannot be undone.”
- Click OK to confirm
11Editing WordPress Thumbnail Images
There’s another great image editing feature of WordPress that many people don’t know about. When editing an image, you have two options how to handle image thumbnails:
- only edit the thumbnail, leaving the main image untouched
- only edit the main image, leaving the thumbnail untouched
What is a thumbnail? WordPress thumbnails are smaller, usually square, versions of your main image. They are automatically created each time you upload a new image.
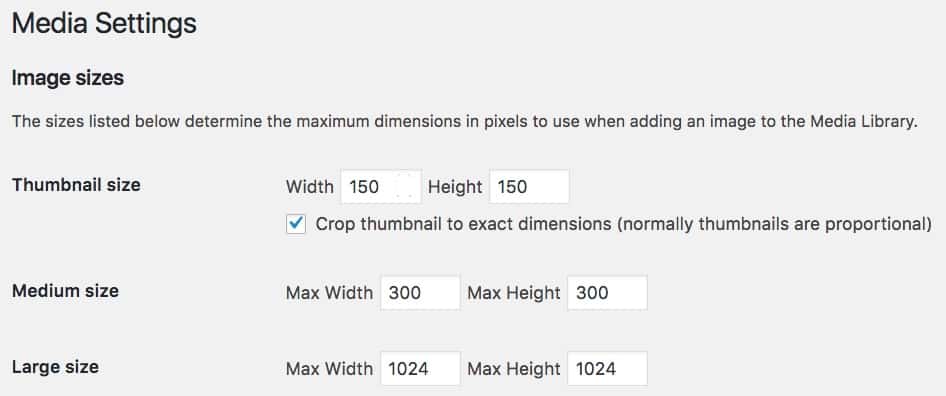
By default, a WordPress thumbnail image is 150px x 150px, and cropped as a perfect square. (You can adjust this on the Settings > Media screen.)
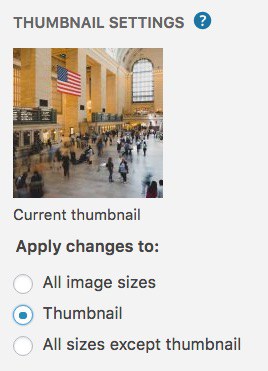
WordPress Thumbnail Settings
In the WordPress image editor, you have 3 options. You can apply changes to:
- All image sizes
- Thumbnail
- All sizes except thumbnail
Just above these settings, WordPress shows you a preview of your current thumbnail (see example above).
Edit Thumbnail Only
To just edit your WordPress thumbnail:
- Navigate to your Media Library and click on the image whose thumbnail you’d like to edit
- Click the Edit Image button
- In the right panel, under Thumbnail Settings, choose “Thumbnail”
- Then proceed to make your image edits
- Click the Save button
Edit Main Image but Not the Thumbnail
If you’d like to edit your WordPress image without affecting the thumbnail:
- Navigate to your Media Library, select an image, and click Edit Image
- In the right panel, under Thumbnail Settings, choose “All sizes except thumbnail”
- Make your image edits
- Click the Save button
12WordPress Image Editing Not Working?
If the edit image feature of WordPress is not working for you, here are a few things that might be going on, and how you can fix them.
I can’t crop an image in WordPress
If the crop button![]() is disabled, or greyed out, it is likely because you haven’t chosen the area on your image that you want to crop. You need to select part of your image before you can crop it.
is disabled, or greyed out, it is likely because you haven’t chosen the area on your image that you want to crop. You need to select part of your image before you can crop it.
Place your cursor at the top-left point where you want to start your crop. Click, hold and drag your cursor down and to the right. Release your mouse when you’ve selected your crop area. Now the crop button should be clickable.
I can’t scale my WordPress image larger
Images can only be scaled down, not up. This is because scaling up would result in a pixelated image. When taking pictures for the web, I recommend taking them with a resolution between 2000-3000px wide. You can scale these images down to reduce their file size (read why in our SEO guide), but they’re also high enough quality to use as-is.
How do you make pictures smaller on WordPress?
There are two ways I recommend making your WordPress images smaller:
- Adjust your default Media Settings (future uploads only)
- Use the ShortPixel plugin (existing & future uploads)
1. Adjust Default Media Settings
- Login to your WordPress admin area
- Navigate to Settings > Media
- Change the pixel values for your image sizes
- Click the Save Changes button
Now, when you go to insert an image onto a WordPress post or page, choose your preferred image size.
2. Use the ShortPixel Plugin
If you want to adjust the image sizes for all previous uploads, you can use the ShortPixel plugin. It’s free for a limited number of images, but also really affordable if you have hundreds of images on your site. Use this link for a discount.
- Install the ShortPixel plugin
- Navigate to Settings > ShortPixel
- Check the box for Resize large images
- Enter maximum image size values for width & height
- Click Save and Go To Bulk Process
- Click the large Start Optimizing button at the top of the screen
![]()
This will resize all of your images based on your ShortPixel settings.
I hope you found this image editing guide helpful. If you’re having an image editing issue in WordPress that I didn’t cover, please leave a comment and I’ll help you solve it. Or check out the entire free video course on YouTube.
We Recommend
https://kinsta.com › wordpress-hosting
Fast and secure infrastructure, worldwide CDN, edge caching, 35 data centers, and enterprise-level features included in all plans. Free site migrations.
https://gravityforms.com › features
Create custom web forms to capture leads, collect payments, automate your workflows, and build your business online. All without ever leaving WordPress.
Leave a Comment